
How to paint a room
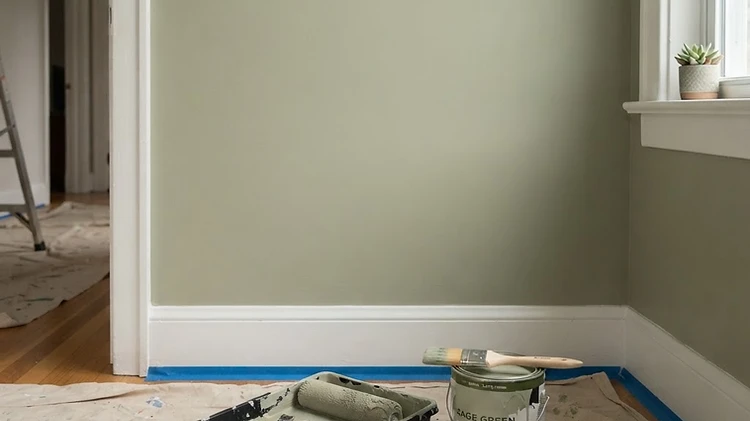
A standard 12 ft by 11 ft room takes one weekend: about 10 hours of work, three gallons of wall paint, and patience between coats. Most of that time is prep, which is exactly why the finish looks good at the end.
Skill level
Beginner
Time
A weekend, about 10 hours of hands-on work plus drying time
Materials
$225 – $325 for a 12 ft x 11 ft room
Tools
11 on the list
Work out your own quantities
Work out your own gallons from your wall area, at the same 350 sq ft per gallon rule this guide uses.
Open the paint calculatorTools you will need
If you own none of these, buy the cheap version of each — they are all reusable.
- 9 in roller with a 3/8 in nap
- 2 to 2.5 in angled brush
- Roller tray and liners
- Extension pole for the roller
- 4 ft stepladder
- Canvas drop cloths
- Painter's tape, 1.5 in
- 3 in putty knife
- Sanding sponge, medium and fine
- Screwdriver for the outlet covers
- Bucket and rags for drips
Materials list, with the math
Quantities are worked out for the size of job described above, and the arithmetic is shown so you can adjust it for your own space.
Wall paint, eggshell
3 gal · $38 – $52 each
The room has about 414 sq ft of wall: 12 + 11 + 12 + 11 = 46 ft of wall length, times a 9 ft ceiling. Two coats is 828 sq ft, one gallon covers about 350 sq ft, and 828 / 350 = 2.4, which rounds up to 3 gallons.
Stain-blocking primer
1 gal · $22 – $30
Only the patches and the scuffed door wall need priming, roughly 100 sq ft in one coat. One gallon covers 350 sq ft, so a single gallon leaves plenty spare.
Painter's tape
3 rolls · $6 – $9 each
One roll tapes about 60 ft. Baseboard, door casing and window trim come to about 150 ft around this room, so three rolls covers it with a little to spare.
Roller covers
2 · $5 – $8 each
One cover per coat. Starting the second coat with a fresh cover stops it dragging half-dry paint back onto the wall.
Canvas drop cloths
2 · $8 – $14 each
One for each half of a 12 ft x 11 ft floor, so you can move the ladder without stepping off the cloth.
Lightweight spackle
1 small tub · $6 – $9
For the nail holes and dents. A small tub fills far more than one room's worth.
Sanding sponges
2 · $4 – $6 each
A medium grit for shaping the filler and a fine grit for the final pass over the patches.
Paintable caulk
1 tube · $6 – $9
Re-caulking the baseboard and casing line, about 46 ft around the room, before the first coat goes on.
Trim paint, semi-gloss
1 qt · $16 – $24
About 46 ft of baseboard and casing at roughly 6 in high is about 23 sq ft, plus the door face. A quart covers about 100 sq ft, which is two coats.
Tray liners
3 · $3 – $4 each
One for the primer and one for each coat, so clean-up is a lift-out rather than a wash.
Estimated total
$225 – $325 before tools you may already own
The steps, in order
12 steps, in the order you would actually do them, with a time estimate for each.
- 1
Move the furniture and protect the floor
Take out everything you can. What stays goes to the middle of the room under a sheet. Lay drop cloths wall to wall, tape them at the edges, and take the outlet and switch covers off, keeping the screws in a cup.
about 45 min
- 2
Fill every hole and dent
Nail holes and dents get spackle, pressed in with a 3 in knife and scraped flat. Deeper gouges get two thin passes rather than one thick one, because a thick blob shrinks as it dries and leaves a dimple you will see under the light.
about 30 min
- 3
Sand the patches and the walls
Sand the filler smooth with a medium sponge, then go over the walls with a fine sponge to knock down any bumps and give the paint something to grip. Wipe the dust off with a damp rag, not a dry one, which just moves it around.
about 30 min
- 4
Caulk the gaps
Run a thin bead of paintable caulk where the baseboard, casing and crown meet the wall, and smooth it with a wet finger. Gaps like these are the reason a fresh paint job can still look untidy afterwards.
about 30 min
- 5
Tape the trim and edges
Press tape along the top of the baseboard, around the casing and the window trim. Run a fingernail along the inner edge so paint cannot creep underneath it.
about 30 min
- 6
Prime the patches and the scuffs
Bare filler and old marks pull in paint differently and will flash through the finish coat. Spot-prime the patches and the scuffed door wall, then let it dry for the time on the can, usually about two hours.
about 45 min
- 7
Cut in the ceiling line
With the angled brush, paint a 2 to 3 in band along the ceiling, working in 3 ft sections and keeping a wet edge. Do the ceiling line first on each wall so the roller can blend into it while it is still wet.
about 60 min
- 8
Cut in the trim and corners
The same band along the baseboard, casing and window trim, and down every inside corner. Brush towards the corner rather than away from it, so the paint does not pile up in the crease.
about 60 min
- 9
Roll the field
Load the roller evenly, roll a W about 3 ft square, then fill it in without lifting the roller off the wall. Work in 3 ft squares and keep a wet edge. Once the paint starts to tack, stop touching it.
about 60 min
- 10
Wait, then roll the second coat
Most wall paints want two to four hours before recoating, and the label wins over any rule of thumb. The second coat goes on exactly the same way, and it is the coat that gives you an even finish.
about 90 min
- 11
Paint the trim
Two coats of semi-gloss on the baseboard, casing and door, cut in by hand along the wall. If the finish feels gritty, sand lightly with a fine sponge between coats and wipe the dust away.
about 60 min
- 12
Pull the tape and put the room back
Pull the tape while the paint is still slightly tacky, at 45 degrees and away from the wall, so it does not tear a skin of dry paint off the edge. Put the covers back once the wall is dry to the touch, and wait a week before washing the walls.
about 45 min
Safety notes
Before you start
- Open a window and keep it open. Even low-VOC paint needs air, and a closed room plus a ladder is a bad combination.
- On a stepladder, keep three points of contact and never use the top two steps.
- Homes built before 1978 may have lead paint. Do not sand or scrape it dry: get it tested, and if it is lead, bring in a certified renovator.
- Take the outlet and switch covers off rather than painting around them, and never paint over the face of a switch or socket.
- Wipe up drips as they happen. A blob of paint on a hard floor is a slip hazard within minutes.
- Keep paint, trays and rags out of reach of children and pets, and never pour leftovers down a drain.
Hire a licensed pro if
Hand these to someone licensed
- The ceiling is over 10 ft, or the room sits above a stairwell, because the ladder and extension work stops being a weekend job.
- The walls are old plaster with cracks, hollow sections or loose keys that need repair before they can be painted.
- The house was built before 1978 and the paint is peeling or chalking, or the walls need sanding.
- There is water staining, bubbling or soft plaster anywhere on a wall: that is a leak, not a paint problem.
- It is an exterior wall above the first floor, or the job needs scaffolding.
Frequently asked questions
- How much paint does a 12 ft by 11 ft room need?
- Three gallons of wall paint for two coats. The walls come to about 414 sq ft, two coats is 828 sq ft, and a gallon covers about 350 sq ft, so 828 divided by 350 rounds up to three gallons.
- Do I need to prime before painting?
- Only the bare patches and any stained or scuffed areas. If the wall is clean and the old color is close to the new one, a two-coat paint job on its own is fine.
- How long should I wait between coats?
- Two to four hours for most wall paints, and longer in cold or damp weather. Follow the label on the can rather than a rule of thumb.
- Can I paint a light color over a dark one?
- You can, but two coats may not hide it. Spot-prime the walls, or use a tinted primer, or budget for a third coat.
- Do I need to sand between coats?
- Not on walls. A light sand between trim coats helps the second coat sit flat, but sanding walls between coats is not worth the dust.
Related guides

walls
How to patch drywall

shelving
How to install floating shelves
Plan this in your own space
Two or three photos of your own room, yard or garage is enough. The app reads the space, then sizes the materials and the steps to what you actually have.
Plan this in your own space